 Facebook Ads Manager: What is it and how to advertise
by Team AllYourVideogames | Oct 8, 2022 | Facebook |
If you are thinking about advertising on social networks, know that Facebook has a specific tool for this: the Ads Manager.
With more than 3 million advertisers around the world, Facebook and other branded networks have great potential to be explored by anyone who wants to advertise a business.
The social network constantly develops solutions and tools to facilitate the work of these advertisers and the Ads Manager is one of them.
In this text, we'll teach you what it is and how to start using Ads Manager to promote your business's content.
What is Ads Manager?
Ads Manager is the starting point for anyone who wants to be successful creating campaigns for social networks. It is a unique business tool. To access it, you must have a Facebook page.
It lets you create and manage ads for Facebook, Instagram, Messenger and Audience Network.
In Ads Manager, you can view, change and see an overview of results for all your campaigns, ad sets and ads.
Learn More: Facebook Marketing: everything you need to know to generate business on the largest social network in the world
This tool is available in Business Manager, which also has other features for businesses such as Pixel, Catalog Manager, and Commerce Manager.
To access it, you must have an ad account. First, you must have a Business Manager account. Therefore, we will teach you how to create them.
How do I get started with Ads Manager?
Assuming you already have a Facebook page, the first step to using Ads Manager is to create your Business Manager account. To do this, follow the steps below:
Step 1. Go to business.facebook.com;
Step 2. Click on the button Create an account, which appears in the upper right corner of the page;
Step 3. write the Your name of your company no field indicated;
Step 4. Select which will be Home from your Manager;
Step 5. put your Your name and the E-mail your business and fill in the remaining information in the required fields.
Once this is done, you will already have a Business Manager and you can create your ad account. For this:
Step 1. Go to Business Settings;
Step 2. Select Accounts and then click Ad Accounts;
Step 3. Please click + Add;
Step 4. Select the Create a new ad account option;
Step 5. Enter the requested information about your account.
Important: Please choose your country and payment currency correctly, as it is not possible to change this information later.
Many people make the mistake of leaving their dollar account. As a result, they end up having losses later, since the American currency was already worth more than five times the value of the real.
When creating your account, you will also need to choose your payment method.
Currently, Facebook accepts payments via:
- credit cards or debit cards;
- PayPal;
- Bank slip.
The ticket option is prepaid. First you put the credits in your account and then you create the ads.
However, it is important to remember that this option does not always appear when requesting the creation of a new account.
Once that's done, you'll be ready to start creating your ads in Ads Manager.
How to create ads in Ads Manager?
Once you have a Page, Business Manager and Ads Account, you are able to start creating your ads using Ads Manager.
The ad creation process is very intuitive, but it's important that you know each of the steps of the ad structuring flow. Are they:
Campaign: at this point, you select your ad campaign objective.
There are dozens of possibilities for you to choose from. Here, we have already listed and explained in detail each of the available objectives. Click here to learn more about it.
Ad set: here you will define the audience to whom you want to deliver the ad, where you want it to be aired, how much you will invest and when it should run.
That is, choose audience, placement, budget and schedule.
Advertisement: this step is where you actually create the ad that will be shown to the public.
Here, you will choose the ad format, upload images and videos, add texts, links, etc.
So it's important to understand that you'll need to go through each of these steps in Ads Manager to create ads.
We have also talked in detail about each of these steps here on the blog. If you want to learn more about them, click here.
Now, check out the step-by-step of how this ad structuring process takes place:
Step 1. Access your Ad Account;
Step 2. Please click Create;
Step 3. A new window will open. In it, choose the objective of your campaign;
Step 4. Enter a name for your campaign;
Step 5. At this point, you have the option to create an A/B Test.
If you want to know more about what this test is, we have a text about it. To read, click here.
Step 6. Set whether to enable budget optimization. If you decide to optimize, you will need to define whether the budget will be daily or lifetime. If you do not choose to activate this option at this time, the investment definition must be made later.
Step 7. Selecione show more options to access the Campaign's Bid Strategy, Ad Scheduling, or Delivery Type settings.
Step 8. Set up a name for your ad set;
Step 9. Enter your audience segmentation data;
Step 10. Choose your ad placements;
Step 11. In case you didn't decide to optimize the budget in step 6, now it's time to define the amounts that will be invested to serve your ad;
Step 12. Set a start date and an end date for your campaign;
Step 13. Choose the page to which the ad will be associated;
Step 14. Set the ad format: carousel, single image or video or collection;
Step 15. Upload the media you want to use in the ad. Choice Add media for ready-made images and videos or create media to create a multimedia presentation;
Step 16. Enter the text that will be displayed in the ad;
Step 17. Depending on the ad objective chosen, at this stage you will need to configure a few more options, such as the pixel and call-to-action (CTA) button;
Step 18. Check the preview of your ad and, if everything is ok, select Confirm.
Ready! Once this is done, your ad will be sent for review. If it complies with Facebook's Advertising Policies, it will be approved and run.
If it fails, you will have the option to edit it and you can resubmit it for approval.
It's important that you know all the rules and guidelines that Facebook has for ads. That way, you don't run the risk of having multiple ads rejected and ending up with your account blocked.
You can check Facebook's Advertising Policies at this link.
How to analyze your results in Ads Manager?
Your work doesn't end when the ad goes live and Facebook knows it. Therefore, in Ads Manager, you can track your results and generate reports for a campaign.
From the Manager, you can get data like:
- The number of people who saw the ad;
- The number of people who clicked on the ad;
- How much of the budget you spent to distribute your content.
This information will help you understand what needs to be improved and if your investment is paying off.
In addition, you will be able to know which of your ads are bringing the best results and, with that, direct your budget to have a greater return.
Here's a step-by-step guide on how to view the results of a Facebook ad in Ads Manager:
Step 1. Access the Ads Manager;
Step 2. Please click Campaigns, ad sets ou Ads;
Step 3. Check the box next to the campaign, ad set or ad you want to check the results for.
Step 4. Click on the chart symbol to open the right side panel;
Step 5. Finally, in the side panel, click Performance, Demographics ou Posicionamento to view graphics specific to the campaign, ad set, or ad you've selected.
Now, understand what each of these data means:
Performance: Here you have access to the number of people who clicked on your ad, how many users you reached and the total cost of the ad.
You can still check the results of each day of delivery. Just browse the line graph.
Clicking Personalize, you can select the metrics you want to have access to.
Demographics: Here you can see how your ad is performing by age and gender.
Browsing through the sections of the graph, you will be able to see individual results for each age group.
Posicionamento: In this graph, you can see how your ad is performing across different placements.
You can see if your ad is, for example, getting more results on Facebook or Instagram. You can also see if the biggest return comes from users with mobile or desktop devices.
Ads Manager App
Something really cool about Facebook Ads Manager is that you can create and track your ads from anywhere, as the tool has a mobile version.
The Ads Manager app is free and available for Android and iOS.
It brings together the main functions of the desktop version, all to make your management tasks even easier.
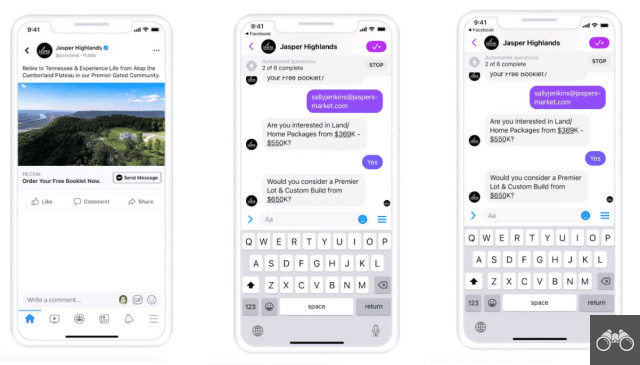
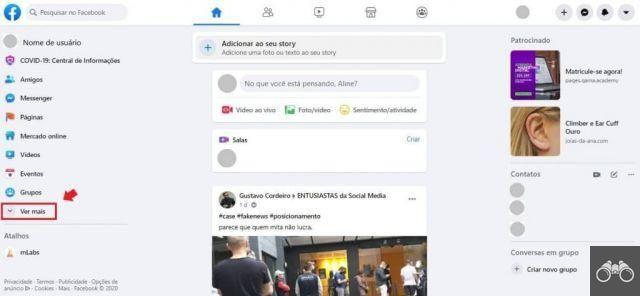
Ads Manager x Boost button
Now, if you already have a page, you must have come across the Boost or Boost Posts button.
Maybe you’ve even created an ad using this feature and are asking “why use Ads Manager and not Boost?”
Know that this is the question of many people. So let's explain this difference.
Generally speaking, the Boost button only promotes posts you've already made on your page and is more geared towards when you're only aiming for reach and engagement.
Also, it doesn't have many configuration options for audience targeting.
On the other hand, the Ads Manager provides a much more complete creation of Facebook Ads.
With it, in addition to promoting already published posts, you can also create ads that will only be delivered to the audiences you define, the so-called dark posts.
It also has many more options for audience targeting, creative settings and possibilities for editing and tracking your results.
In short, using Ads Manager is a much more strategic choice.
If you want to go deeper into this subject and understand all the differences between the Ads Manager and the Boost button, we suggest you check out this text we published here on the blog.
Want to learn even more about Ads Manager and other features made available exclusively to businesses through Facebook? So, keep following our content.
Before you go, let us know in the comments if you already knew about Ads Manager and if you're going to use it in your business's digital marketing strategy and run ads on Facebook.